मुझे याद है जब मैं पहली बार manufacturing industry में आया था। एक दिन हमारी फैक्ट्री में एक बड़ी problem आई – हमने 500 parts reject कर दिए क्योंकि micrometer की reading गलत आ रही थी। बाद में पता चला कि उस micrometer का calibration expire हो चुका था। उस दिन मुझे समझ आया कि calibration कितना important है
दोस्तों, अगर आप manufacturing industry में काम करते हैं या quality control से जुड़े हैं, तो आपने instruments पर calibration sticker जरूर देखा होगा। इस sticker पर लिखा होता है – calibration date, next due date, और lab का नाम। लेकिन क्या आप जानते हैं कि यह calibration क्या है और क्यों इतना जरूरी है?
आज के इस article में मैं आपको calibration के बारे में complete जानकारी दूँगा। मेरे 8+ साल के industry experience से मैं आपको practical tips भी दूंगा जो books में नहीं मिलतीं।
Calibration क्या है? | What is Calibration in Hindi
Calibration एक ऐसी process है जिसमें हम किसी measuring instrument की accuracy को check करते हैं।
सरल शब्दों में कहें तो, calibration में हम अपने measuring instrument (जैसे micrometer, vernier caliper, dial gauge, height gauge) को एक standard instrument या master instrument के साथ compare करते हैं। इससे हमें पता चलता है कि हमारा instrument कितना accurate reading दे रहा है।
Technical Definition:
“Calibration एक ऐसी प्रक्रिया है जिसके अंदर जो हमारा measuring instrument है, उसको एक standard equipment या master equipment के साथ compare किया जाता है, कि कितना accurately reading दे रहा है।”
आसान भाषा में समझें:
मान लीजिए आपके पास एक weighing machine है। आप उस पर 1 kg का weight रखते हैं, लेकिन machine 950 grams दिखा रहा है। इसका मतलब है कि machine की accuracy कम हो गई है।
Calibration में हम इसी तरह check करते हैं कि:
- हमारा instrument सही reading दे रहा है या नहीं
- कितना error है
- क्या हम इसे use कर सकते हैं या नहीं
Real-World Example 1: Glass Measurement
मान लीजिए आपके पास दो measuring glass हैं – दोनों 200 ml के हैं:
- Glass X: एक manufacturer का
- Glass Y: दूसरे manufacturer का
अब हमने एक standard 200 ml flask लिया (जो lab से certified है)। जब हमने check किया:
- Glass X में: 190 ml आया (10 ml कम)
- Glass Y में: 205 ml आया (5 ml ज्यादा)
Result: दोनों ही glass calibration में reject हो गए! अब हम इन glasses से accurate 200 ml नहीं नाप सकते।
Real-World Example 2: Micrometer Calibration
एक automotive company में 25-50mm range का micrometer use हो रहा था। Daily 100+ parts check किए जा रहे थे। 6 महीने बाद जब calibration हुआ:
Calibration Results:
- 25mm पर: Actual reading 25.003mm (Error: +0.003mm)
- 30mm पर: Actual reading 30.005mm (Error: +0.005mm)
- 40mm पर: Actual reading 40.008mm (Error: +0.008mm)
- 50mm पर: Actual reading 50.012mm (Error: +0.012mm)
Decision: Micrometer reject हो गया क्योंकि error acceptable limit (±0.005mm) से ज्यादा था।
Impact: अगर यह micrometer use होता रहता, तो सभी parts का dimension गलत होता। Customer को defective parts जाते।
Real-World Example 3: Temperature Sensor
एक heat treatment company में furnace का temperature sensor use हो रहा था। Sensor 850°C दिखा रहा था, लेकिन actual temperature 820°C था (30°C का difference)।
Result: Parts properly heat treat नहीं हो रहे थे। Hardness requirement नहीं मिल रही थी। 200 parts reject हो गए। Loss: ₹3 लाख।
Solution: Sensor को calibrate किया, replace किया, और सभी parts को re-process किया।

Calibration का Full Form और Meaning
Calibration का Meaning in Hindi:
Calibration का Hindi meaning है: “अंशांकन” या “मापांकन”
लेकिन industry में हम commonly “Calibration” word ही use करते हैं क्योंकि यह technical term है और सभी इसे समझते हैं।
Calibration शब्द की Origin:
Calibration word Latin भाषा के “calibratus” से आया है, जिसका मतलब है – “to measure accurately” (सटीक रूप से मापना)।
Simple Explanation:
Calibration = Accuracy Check + Verification
मतलब कि हम अपने instrument की accuracy को check करते हैं और verify करते हैं कि वह सही reading दे रहा है या नहीं।
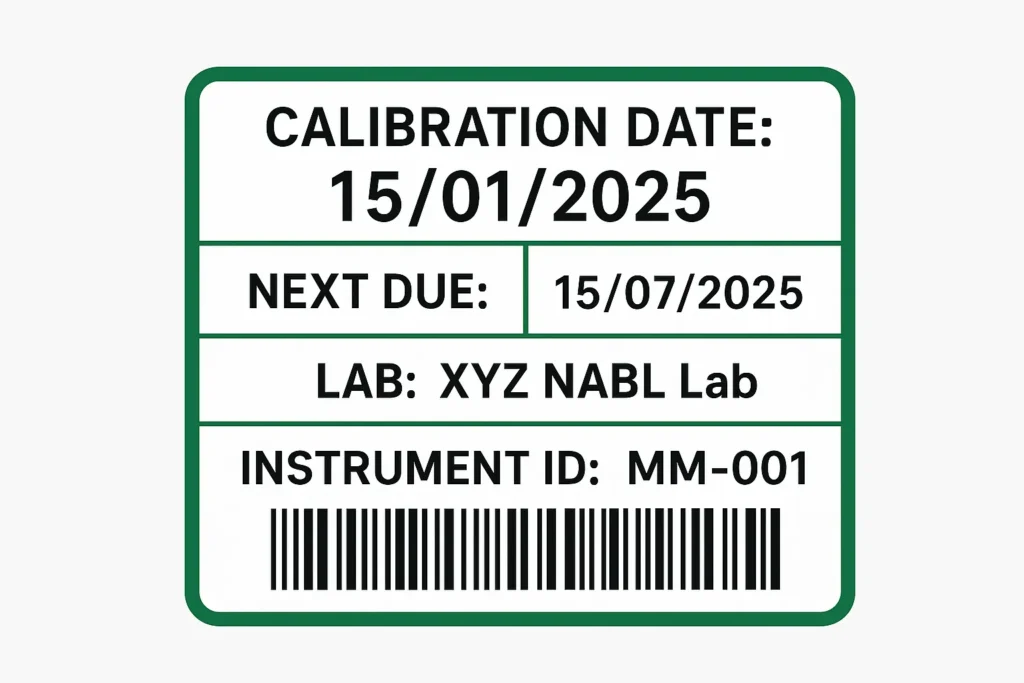
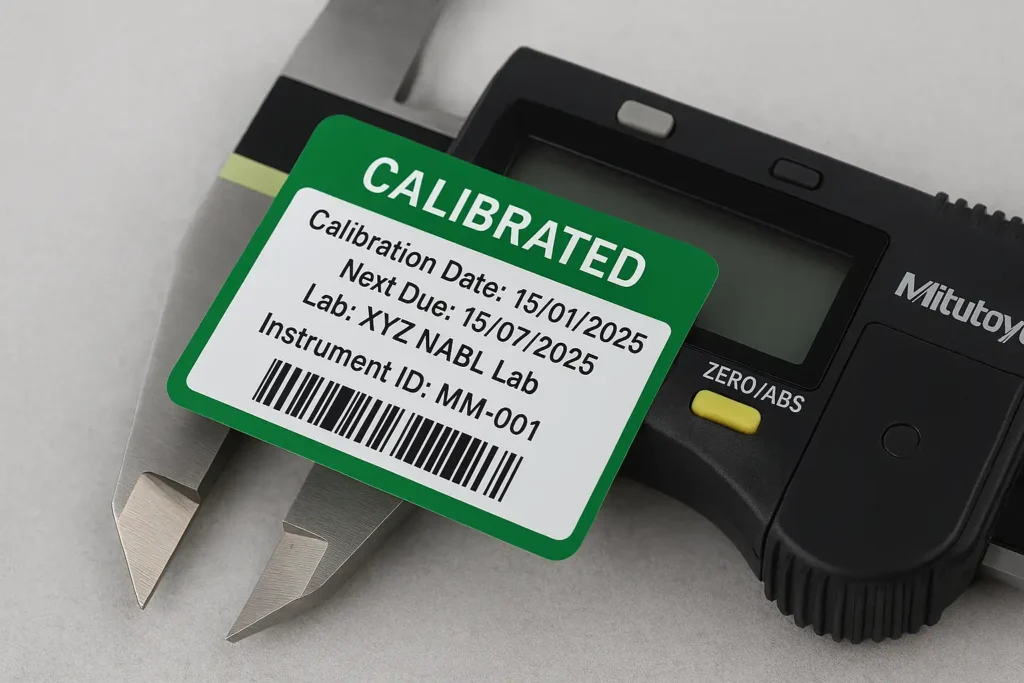
Calibration Sticker क्या होता है?
जब आप किसी measuring instrument को देखते हैं, तो उस पर एक sticker लगा होता है। यह calibration sticker होता है।
Calibration Sticker में क्या Information होती है?
- Calibration Date: कब calibrate हुआ था (DD/MM/YYYY)
- Next Due Date: अगली बार कब calibrate होना है
- Lab Name: किस lab से calibrate हुआ
- Instrument ID: Instrument का unique number
- Status: Pass/OK या Fail/Reject
- Certificate Number: Calibration certificate का number
Calibration Sticker क्यों Important है?
- तुरंत पता चल जाता है कि instrument valid है या नहीं
- Production floor पर easily visible होता है
- Operators को पता रहता है
- Audit में easily check कर सकते हैं
- Overdue instruments को identify कर सकते हैं
Real Example:
एक production floor पर 5 micrometers थे। एक का sticker red था (overdue), बाकी green थे (valid)। Operator ने red sticker वाला use कर लिया। 50 parts बने, सभी reject हो गए और इस कारण से कंपनी मे ₹25,000 का नुकसान हो गया ।
Lesson: हमेशा sticker check करें before use
Calibration क्यों जरूरी है? | Why Calibration is Important
दोस्तों, calibration बहुत ही important process है। आइए समझते हैं क्यों:
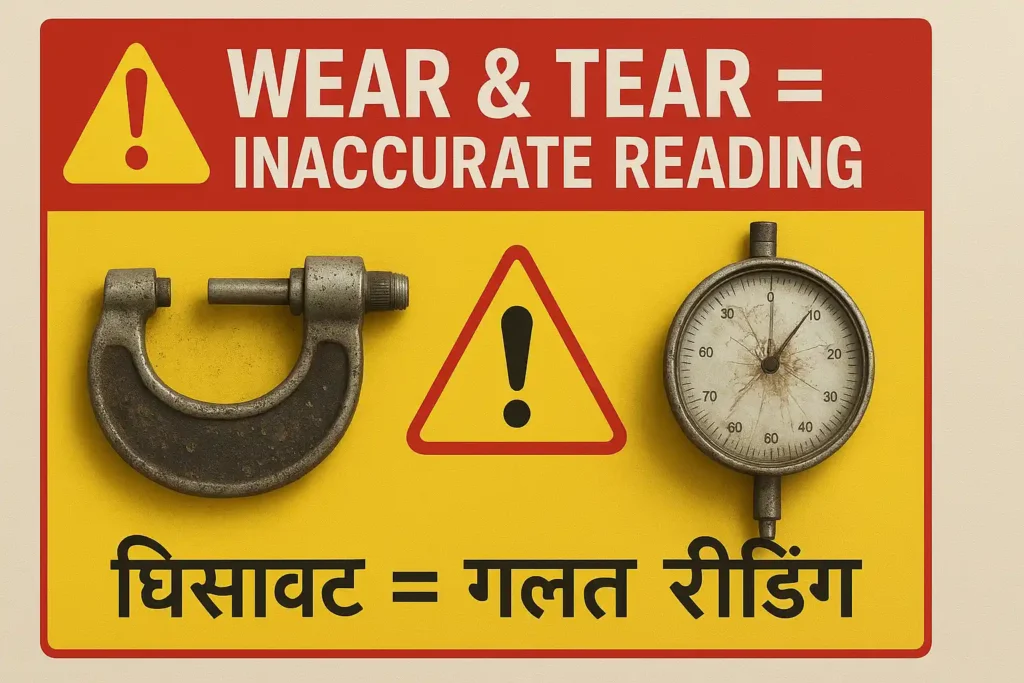
1. Instrument Wear and Tear (घिसावट)
समय के साथ और regular use से instruments में wear and tear आ जाता है:
- Moving parts घिस जाते हैं: Micrometer के spindle और anvil, vernier के jaws
- Springs कमजोर हो जाते हैं: Dial gauge की spring
- Accuracy कम हो जाती है: Reading गलत आने लगती है
- Parts टूट जाते हैं: Dial indicator का glass, vernier का scale
Real Example:
एक CNC shop में 0-25mm micrometer daily 80-100 times use हो रहा था। 3 महीने में:
- Spindle में 0.008mm wear आ गया
- Anvil face पर scratches आ गए
- Reading में +0.012mm का constant error आने लगा
Impact: 300 parts बने जो dimension में 0.012mm oversize थे। Customer ने reject कर दिए। Loss: ₹1.5 लाख।
2. Environmental Factors (पर्यावरणीय कारण)
Manufacturing environment में बहुत सारे factors instruments को affect करते हैं:
- Dust और Dirt: Moving parts में dust जाने से friction बढ़ता है
- Temperature Changes: Metal expand/contract होता है
- Humidity: Moisture से rust आ सकता है
- Vibration: Machine vibration से instrument damage हो सकता है
- Chemical Exposure: Coolant, oil से coating damage होती है
Real Example:
एक foundry में dial gauge use हो रहा था। Environment बहुत dusty था 2 महीने में ठीक से सफाई नहीं हुई थी।
- Dial gauge के mechanism में dust चली गई
- Needle smooth move नहीं कर रही थी
- Reading stick हो रही थी
- Calibration में 0.05mm का error मिला
Solution: Gauge को clean किया, calibrate किया, और protective cover लगाया।
3. Quality Assurance (गुणवत्ता सुनिश्चित करना)
- Accurate measurements के बिना quality product नहीं बना सकते
- Customer को defective product जाने से बचाता है
- Company की reputation बनी रहती है
- Customer satisfaction बढ़ती है
Real Example:
एक automotive supplier को engine parts supply करने थे। Tolerance: ±0.02mm। Vernier caliper का calibration expire था, लेकिन use हो रहा था।
What Happened:
- 500 parts बने और dispatch हो गए
- Customer ने incoming inspection में reject कर दिए
- सभी parts dimension में 0.05mm out थे
- Customer ने penalty लगाई: ₹2 लाख
- Parts को वापस लाना पड़ा और scrap करना पड़ा
- Total loss ₹5 लाख का हुआ जो की काफी जायद था ।
Lesson: Calibration ignore करना बहुत महंगा पड़ता है!
4. Cost Saving (लागत बचत)
Calibration से पैसे बचते हैं:
- Rejection कम होती है: Accurate measurement = Less rejection
- Rework कम होता है: पहली बार में सही बनता है
- Customer complaints कम: Return और replacement कम
- Production loss कम: Smooth production flow
Real Cost Comparison:
Without Calibration:
- 1000 parts बने
- 100 parts reject (10%)
- Loss = ₹50,000
With Calibration:
- 1000 parts बने
- 10 parts reject (1%)
- Calibration cost = ₹2,000
- Loss = ₹5,000
- Total = ₹7,000
- Net Saving = ₹43,000
5. Compliance और Audit Requirements
Manufacturing industry में calibration mandatory है:
- ISO 9001: Quality management system के लिए जरूरी
- IATF 16949: Automotive industry के लिए compulsory
- AS9100: Aerospace industry standard
- Customer Audits: सभी customers calibration records check करते हैं
- Government Regulations: Legal requirement
Audit में क्या check होता है:
- Calibration certificates available हैं या नहीं
- NABL authorized lab से calibration हुआ है या नहीं
- Due date expire तो नहीं है
- Master equipment का certificate है या नहीं
- Calibration plan maintain है या नहीं
Real Audit Example:
एक company का ISO audit हो रहा था। Auditor ने 10 instruments check किए:
- 3 instruments overdue थे
- 2 instruments के master certificate नहीं थे
- 1 instrument non-NABL lab से calibrated था
Result: Major Non-Conformance (NC) मिला। Certificate hold हो गया। सारे instruments को emergency calibration करवाना पड़ा। तब थोड़ी सी चूक के कारण Extra cost: ₹30,000 आयी
6. Safety और Reliability
कुछ measurements safety के लिए critical होती हैं:
- Pressure gauges (boiler, compressor)
- Torque wrenches (critical fasteners)
- Temperature sensors (heat treatment)
- Load cells (crane, lifting equipment)
इनमें गलत reading = Safety hazard!
Real Safety Example:
एक manufacturing plant में boiler का pressure gauge calibrate नहीं था। Gauge 8 bar दिखा रहा था, लेकिन actual pressure 12 bar था। Safety valve भी stuck था।
What Could Have Happened: Boiler blast हो सकता था। Lives at risk थीं।
What Actually Happened: Routine inspection में पता चल गया। Gauge replace किया, safety valve service किया। Disaster टल गया।
Calibration कब करना चाहिए? | When to Calibrate
दोस्तों, यह बहुत important question है। सभी instruments की same frequency नहीं हो सकती।
Calibration Frequency का Logic:
Calibration frequency depend करती है:
- Usage frequency (कितनी बार use होता है)
- Instrument type (कौन सा instrument है)
- Criticality (कितना important measurement है)
- Manufacturer recommendation (company ने क्या suggest किया)
- Historical data (पहले कैसा performance था)
Calibration Frequency Examples:
- Plug Gauge (100% inspection) – हर part check – 3 महीने
- Thread Gauge (Production line) – Daily 100+ times – 3 महीने
- Micrometer (QC inspection) – Daily 10-15 times – 6 महीने
- Vernier Caliper (Regular use) – Daily 5-10 times – 6 महीने
- Dial Indicator (Setup check) – Weekly 2-3 times – 12 महीने
- Height Gauge (Occasional) – Weekly 1-2 times – 12 महीने
- Profile Projector (Rare use) – Monthly 1-2 times – 18-24 महीने
- Surface Plate (Reference) – Monthly check – 24 महीने
Common Mistake:
बहुत सारी companies सभी instruments की same frequency रख देती हैं (जैसे सभी को 6 months)
Problem:
- जो instrument daily use हो रहा है, उसे 6 months बहुत ज्यादा है
- जो instrument monthly use हो रहा है, उसे 6 months unnecessary है
- Unnecessary cost आती है
- Resources का wastage होता है
Solution: Usage-based frequency decide करें!
Calibration Frequency तय करने के 2 Methods:
Method 1: Frequency of Use
- Very High Usage (Daily 50+ times) → 3 months
- High Usage (Daily 10-20 times) → 6 months
- Medium Usage (Weekly) → 12 months
- Low Usage (Monthly) → 18-24 months
Method 2: Manufacturer’s Recommendation
- Instrument के manual में check करें
- Manufacturer ने जो recommend किया है
- Generally 12 months या 24 months होता है
Best Practice:
Initial: 6 months से start करें
After 3-4 calibrations:
- अगर हमेशा pass होता है → Frequency बढ़ा सकते हैं (12 months)
- अगर 1-2 बार fail होता है → Frequency कम करें (3 months)
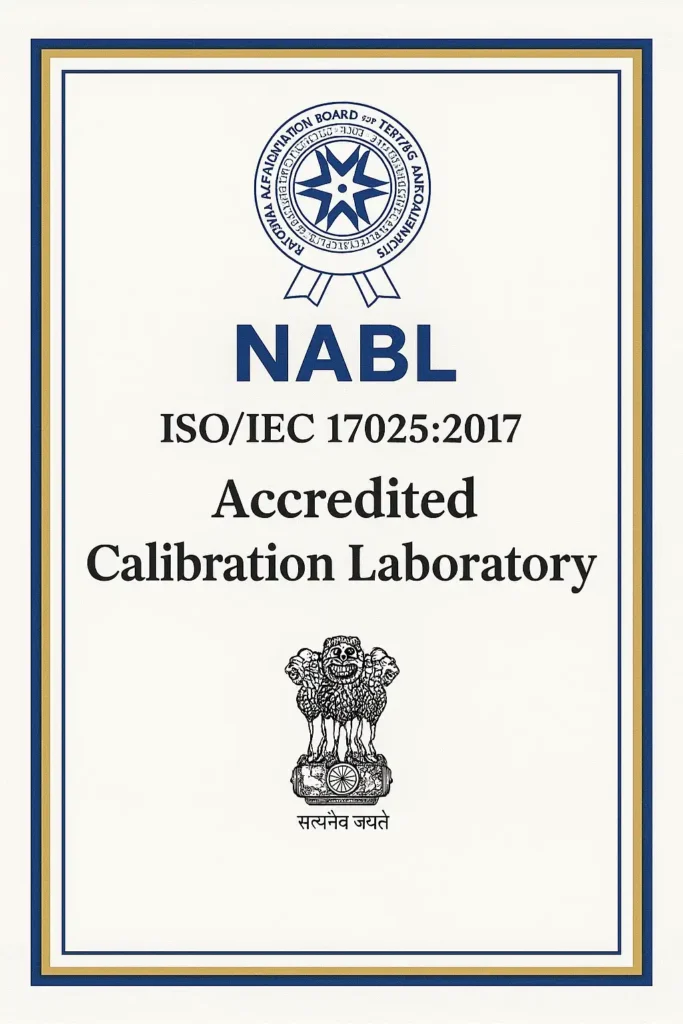
NABL Authorization क्या है? | What is NABL
NABL Full Form:
NABL = National Accreditation Board for Testing and Calibration Laboratories
NABL क्या है?
NABL Government of India की एक authority है जो calibration labs को authorize करती है।
Important: कोई भी lab calibration service नहीं दे सकती। उसे NABL से accreditation लेना जरूरी है।
NABL Certification Process:
NABL labs को ISO/IEC 17025:2017 standard के according check करती है:
- Lab competent है या नहीं
- Proper equipment है या नहीं
- Qualified और trained staff है
- Proper procedures follow करते हैं
- Quality system maintain करते हैं
- Traceability ensure करते हैं
NABL Certificate में क्या होता है?
- Lab का नाम और address
- Certificate number (unique)
- ISO/IEC 17025:2017 mention
- Scope of accreditation:
- कौन-कौन से instruments calibrate कर सकते हैं
- किस range में
- किस accuracy के साथ
- Issue date और validity date
- NABL logo और authorized signature
Important Warning – Fake Labs से बचें!
आजकल बहुत सारी fake calibration labs खुल गई हैं:
Problem:
- खुद authorized नहीं होती
- Middleman का काम करती हैं
- आपसे instrument लेती हैं
- दूसरी authorized lab में जाती हैं
- Extra charges लेती हैं
- आपको वापस दे देती हैं
Solution:
- हमेशा NABL certificate की copy मांगें
- NABL website पर verify करें: www.nabl-india.org
- Lab visit करें (if possible)
- Direct authorized lab से contact करें
NABL Website पर Verification:
- Visit: www.nabl-india.org
- Click on “Directory of Accredited Labs”
- Search by lab name या location
- Check accreditation status
- Download certificate copy
मैंने personally एक incident देखा है। एक company ने बिना NABL certificate check किए calibration करवाया। Customer audit में problem आई। Auditor ने NABL certificate मांगा तो पता चला कि वह lab fake थी। सारे instruments को दोबारा calibrate करवाना पड़ा। 50,000 रुपये extra खर्च हो गए।
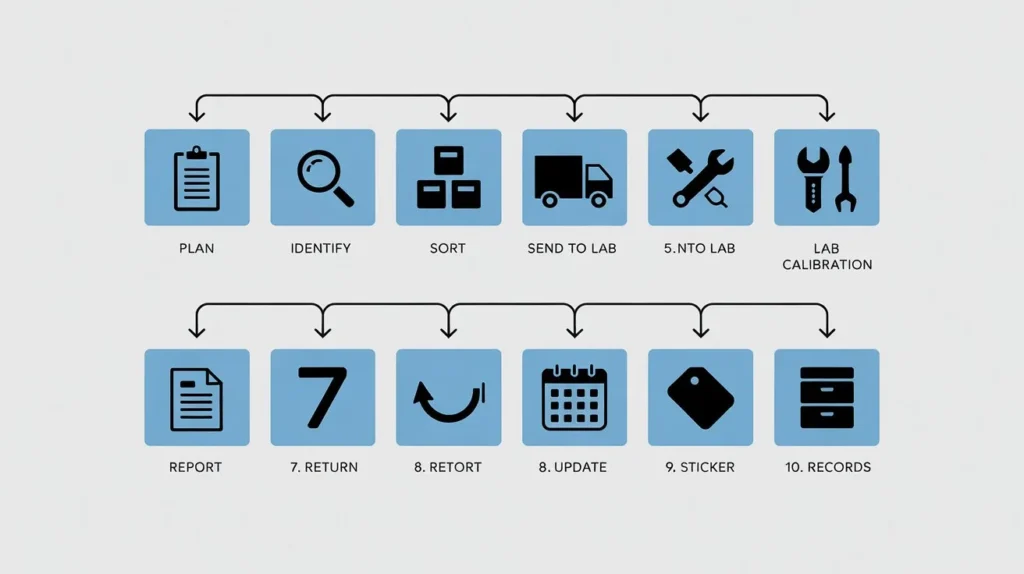
Calibration Process – Step by Step | कैलिब्रेशन कैसे होता है
- Step 1: Calibration Plan बनाएं
- Step 2: Due instruments identify करें
- Step 3: Instruments को sort करें (batches में)
- Step 4: NABL lab को भेजें
- Step 5: Lab calibration करती है
- Step 6: Calibration report मिलती है
- Step 7: Instruments वापस आते हैं
- Step 8: Next due date update करें
- Step 9: Calibration sticker लगाएं
- Step 10: Records maintain करें
Detailed Steps for Calibration Process
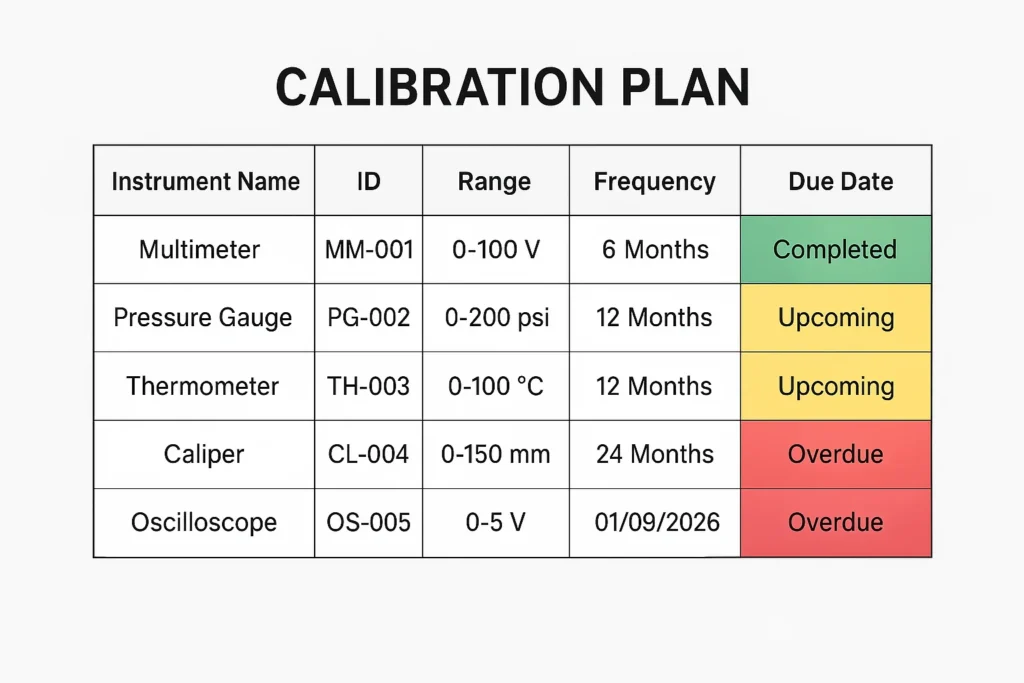
Step 1: Calibration Plan बनाना
सबसे पहले एक master list बनाएं जिसमें हो:
- – सभी measuring instruments की list
- – उनका unique identification number
- – Calibration frequency
- – Last calibration date
- – Next due date
- – Department/Location
Step 2: Due Instruments Identify करना
हर month check करें…
- इस month कौन-कौन से instruments due हैं
- Next month में कौन से due होंगे
- कोई overdue तो नहीं है
Pro Tip: Due date से 1 week पहले planning start करें!
Step 3: Batches में Sort करना
अगर बहुत सारे instruments हैं..
- 10-10 या 15-15 के batches बनाएं
- सभी एक साथ मत भेजें (production रुक जाएगा)
- Priority के according भेजें
- Backup instruments का arrangement करें
Step 4: NABL Lab को भेजना
Proper packing करें (damage से बचाएं)
- Instrument list attach करें
- Purchase order issue करें
- Expected delivery date confirm करें
- Transportation arrange करें
Step 5: Lab में Calibration
Lab में क्या होता है….
- Instrument को receive करते हैं
- Visual inspection करते हैं
- Clean करते हैं (if needed)
- Master equipment से compare करते हैं
- Multiple points पर reading लेते हैं
- Error calculate करते हैं
- Pass/Fail decide करते हैं
- Report बनाते हैं
- Calibration sticker लगाते हैं
Step 6: Calibration Report
Lab detailed report बनाती है जिसमें…
- Instrument details
- Actual readings
- Standard readings
- Error values
- Uncertainty values
- Pass/Fail status
- Master equipment details
- Calibration date और due date
Step 7: Instruments Return
Instruments वापस आते हैं…
- Calibration certificate के साथ
- Calibration sticker लगा हुआ
- Master equipment का certificate (copy)
- Packing में safely
Step 8: Records Update
- Calibration plan में next due date update करें
- Calibration register में entry करें
- Soft copy save करें
- Hard copy file करें
Step 9: Calibration Sticker
Instrument पर sticker लगाएं जिसमें….
- Calibration date
- Next due date
- Lab name
- Instrument ID
- Status (Pass/Fail)
Step 10: Record Maintenance
- Certificates को properly file करें
- Instrument-wise folder बनाएं
- Digital backup maintain करें
- Audit के लिए ready रखें